Workbench & Usage Flow
Get familiar with every region of the workbench and the complete workflow — from table schema to callable APIs.
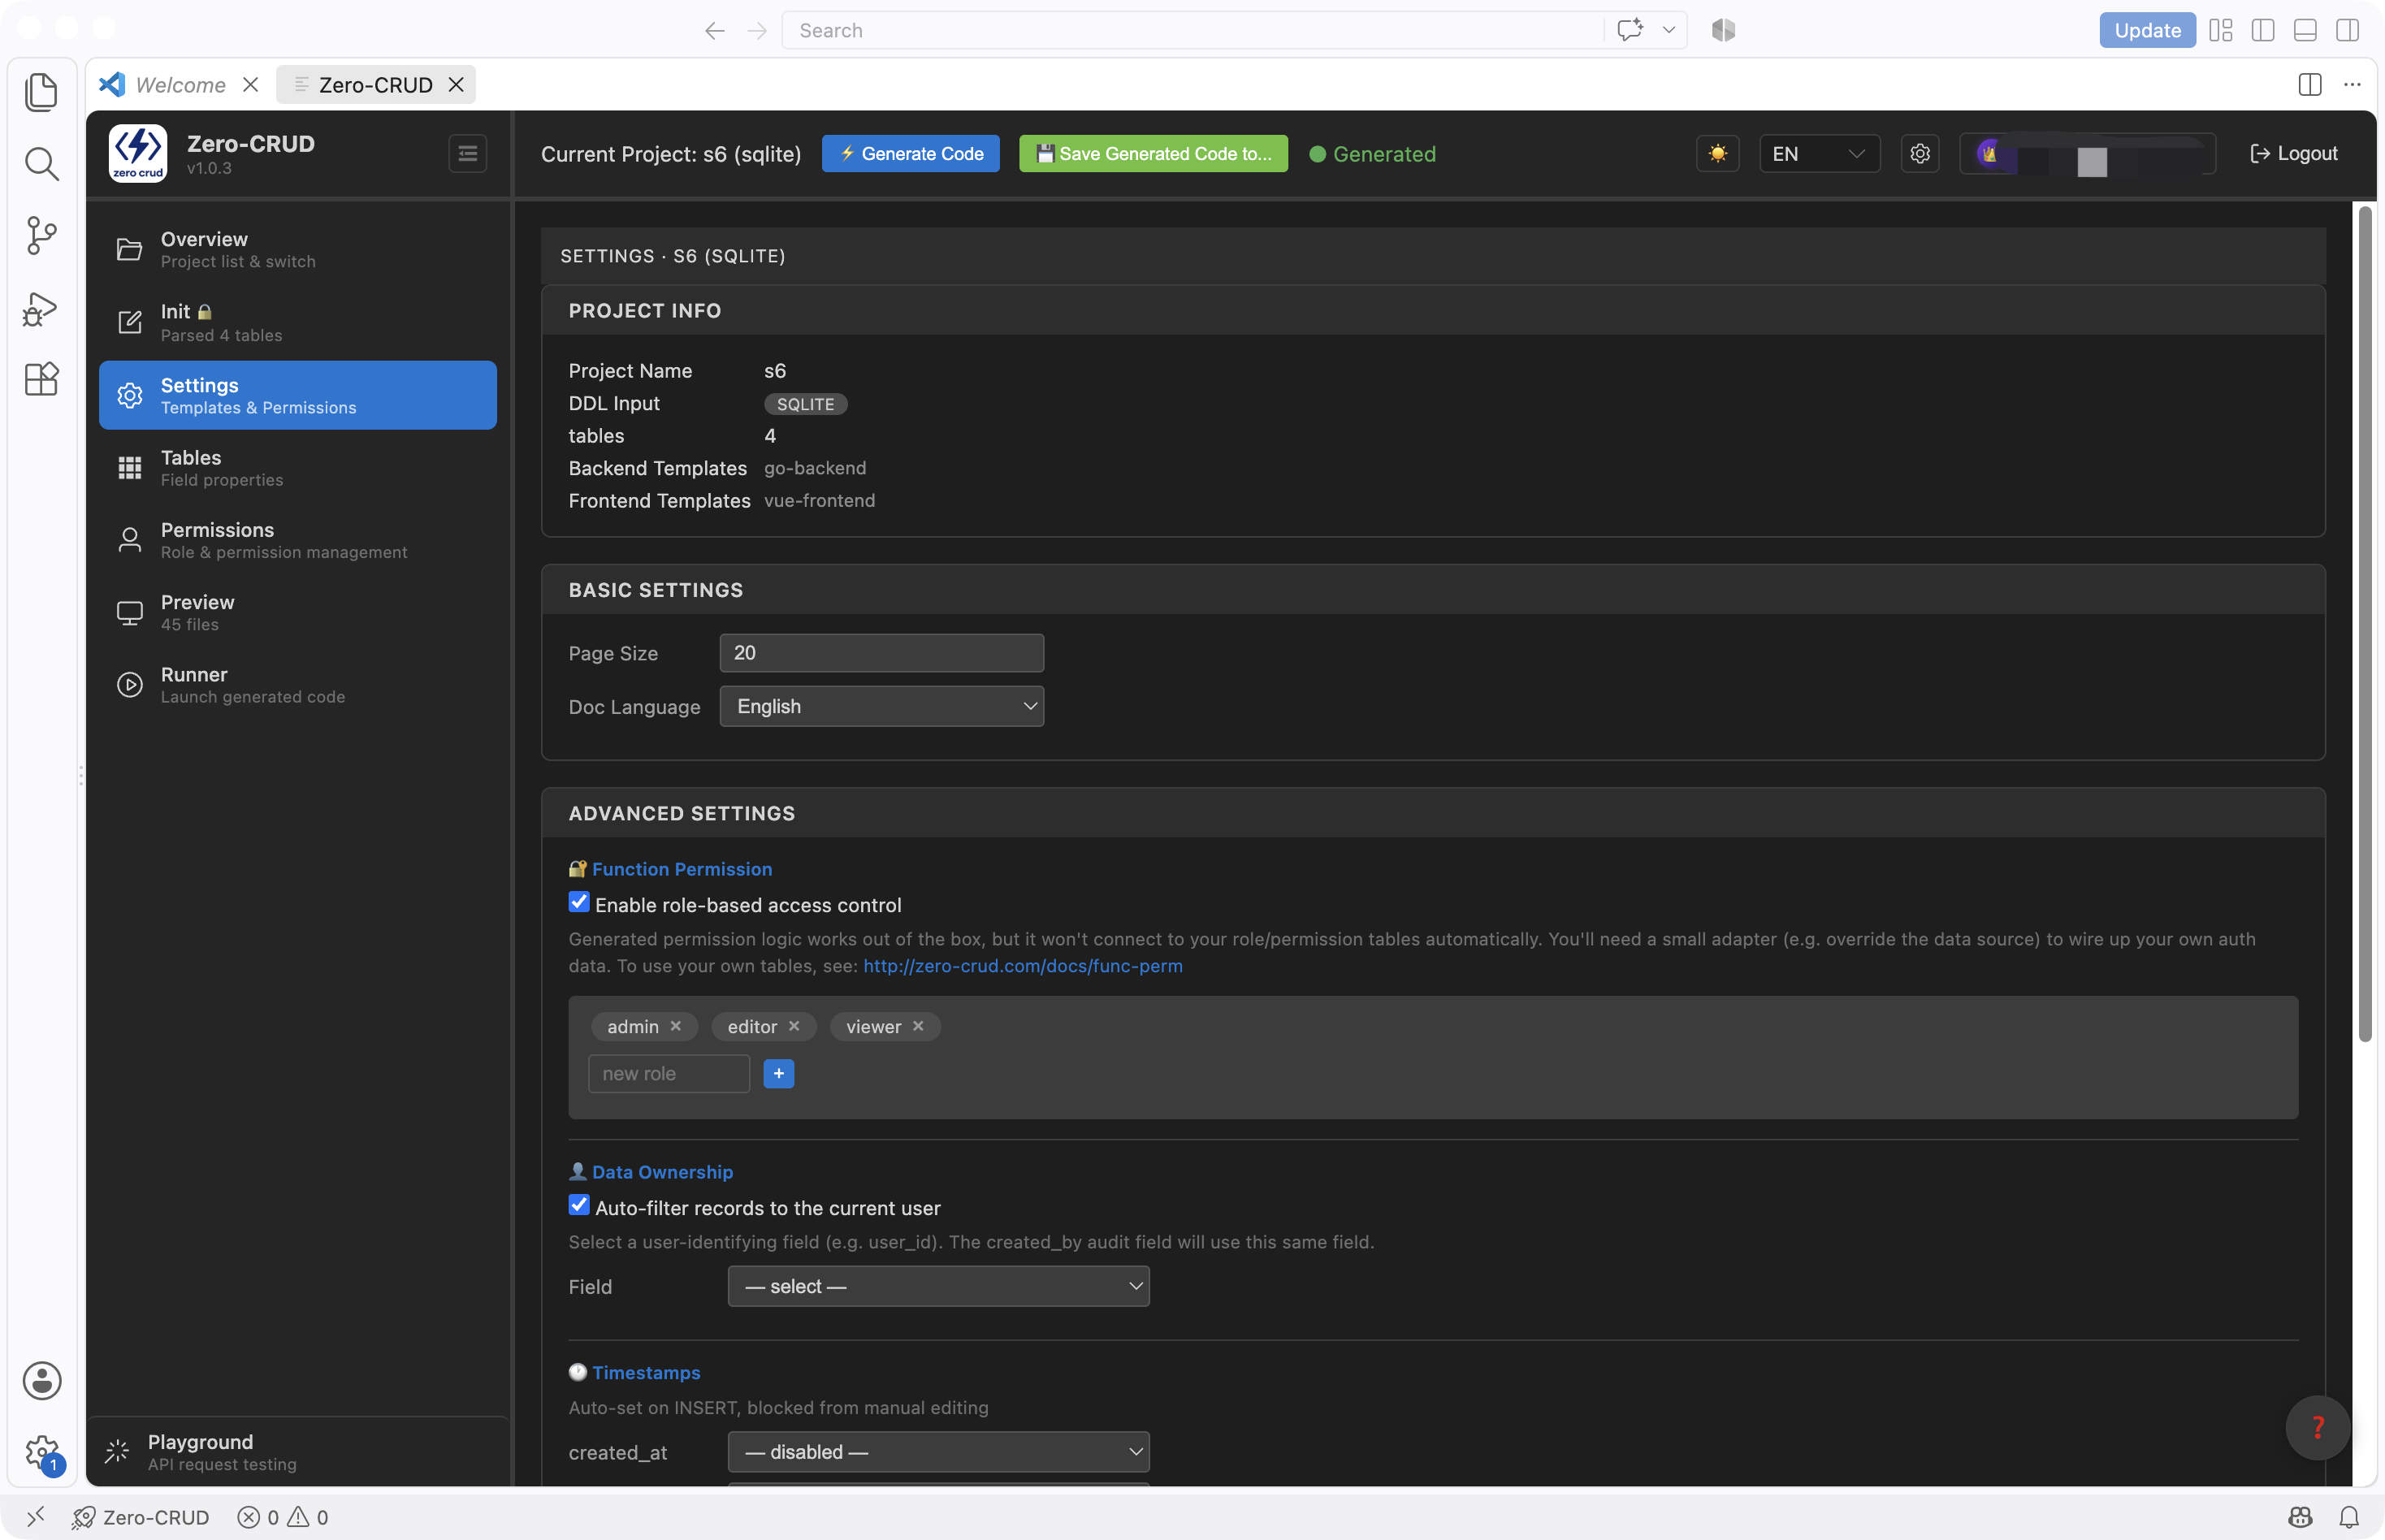
The workbench opens in the VS Code main window (editor area): navigation on the left, the current feature’s content on the right.
UI tour
Sidebar navigation
| Nav | What it is | When to use it |
|---|---|---|
| Project | Project list — create / switch / delete | managing multiple projects |
| Init | Describe the table schema: paste DDL / read from a connected DB | starting a new project |
| Settings | Generation parameters (basic + advanced) | configuring before generation |
| Tables | Table & field management | adjusting field attributes, viewing relationships |
| Permissions | Role & operation/field/data permission config (subscription) | when you need access control |
| Preview | Generated file tree — view / download | confirming output after generation |
| Runner | Start / stop the generated backend & frontend | local run & test |
| Playground | Send requests to the APIs and test | verifying your API |
Project state shows in the nav area: Not initialized (no tables yet) → Parsed (has tables) → Generated (has code). As each step progresses, the top status changes too.
Top bar
- Generate button: one-click code generation for the current project
- Account card: login state, subscription info, contact & account settings
- Theme switch: dark / light / follow system
- Language: 中文 / English
Table-management essentials
Under Tables you can view each table’s fields and each field’s attributes:
- Type, whether it’s a primary key, whether it’s queryable / insertable / updatable
- These attributes directly decide the generated API behavior (e.g. a non-insertable field can’t be written in a Create request)
Field attributes are linked with Playground’s “writable fields” — change them here and both generation and testing follow.
Function permissions (subscription)
Under Function Permissions, configure roles & permissions: which role can do which operations on which tables, which fields it can see, and how data is scoped. Config is reflected into the generated code (see Permission Integration).
Workflow
The core chain: describe schema → configure settings → generate → preview/download → run & test. Walk through it with the users table below.
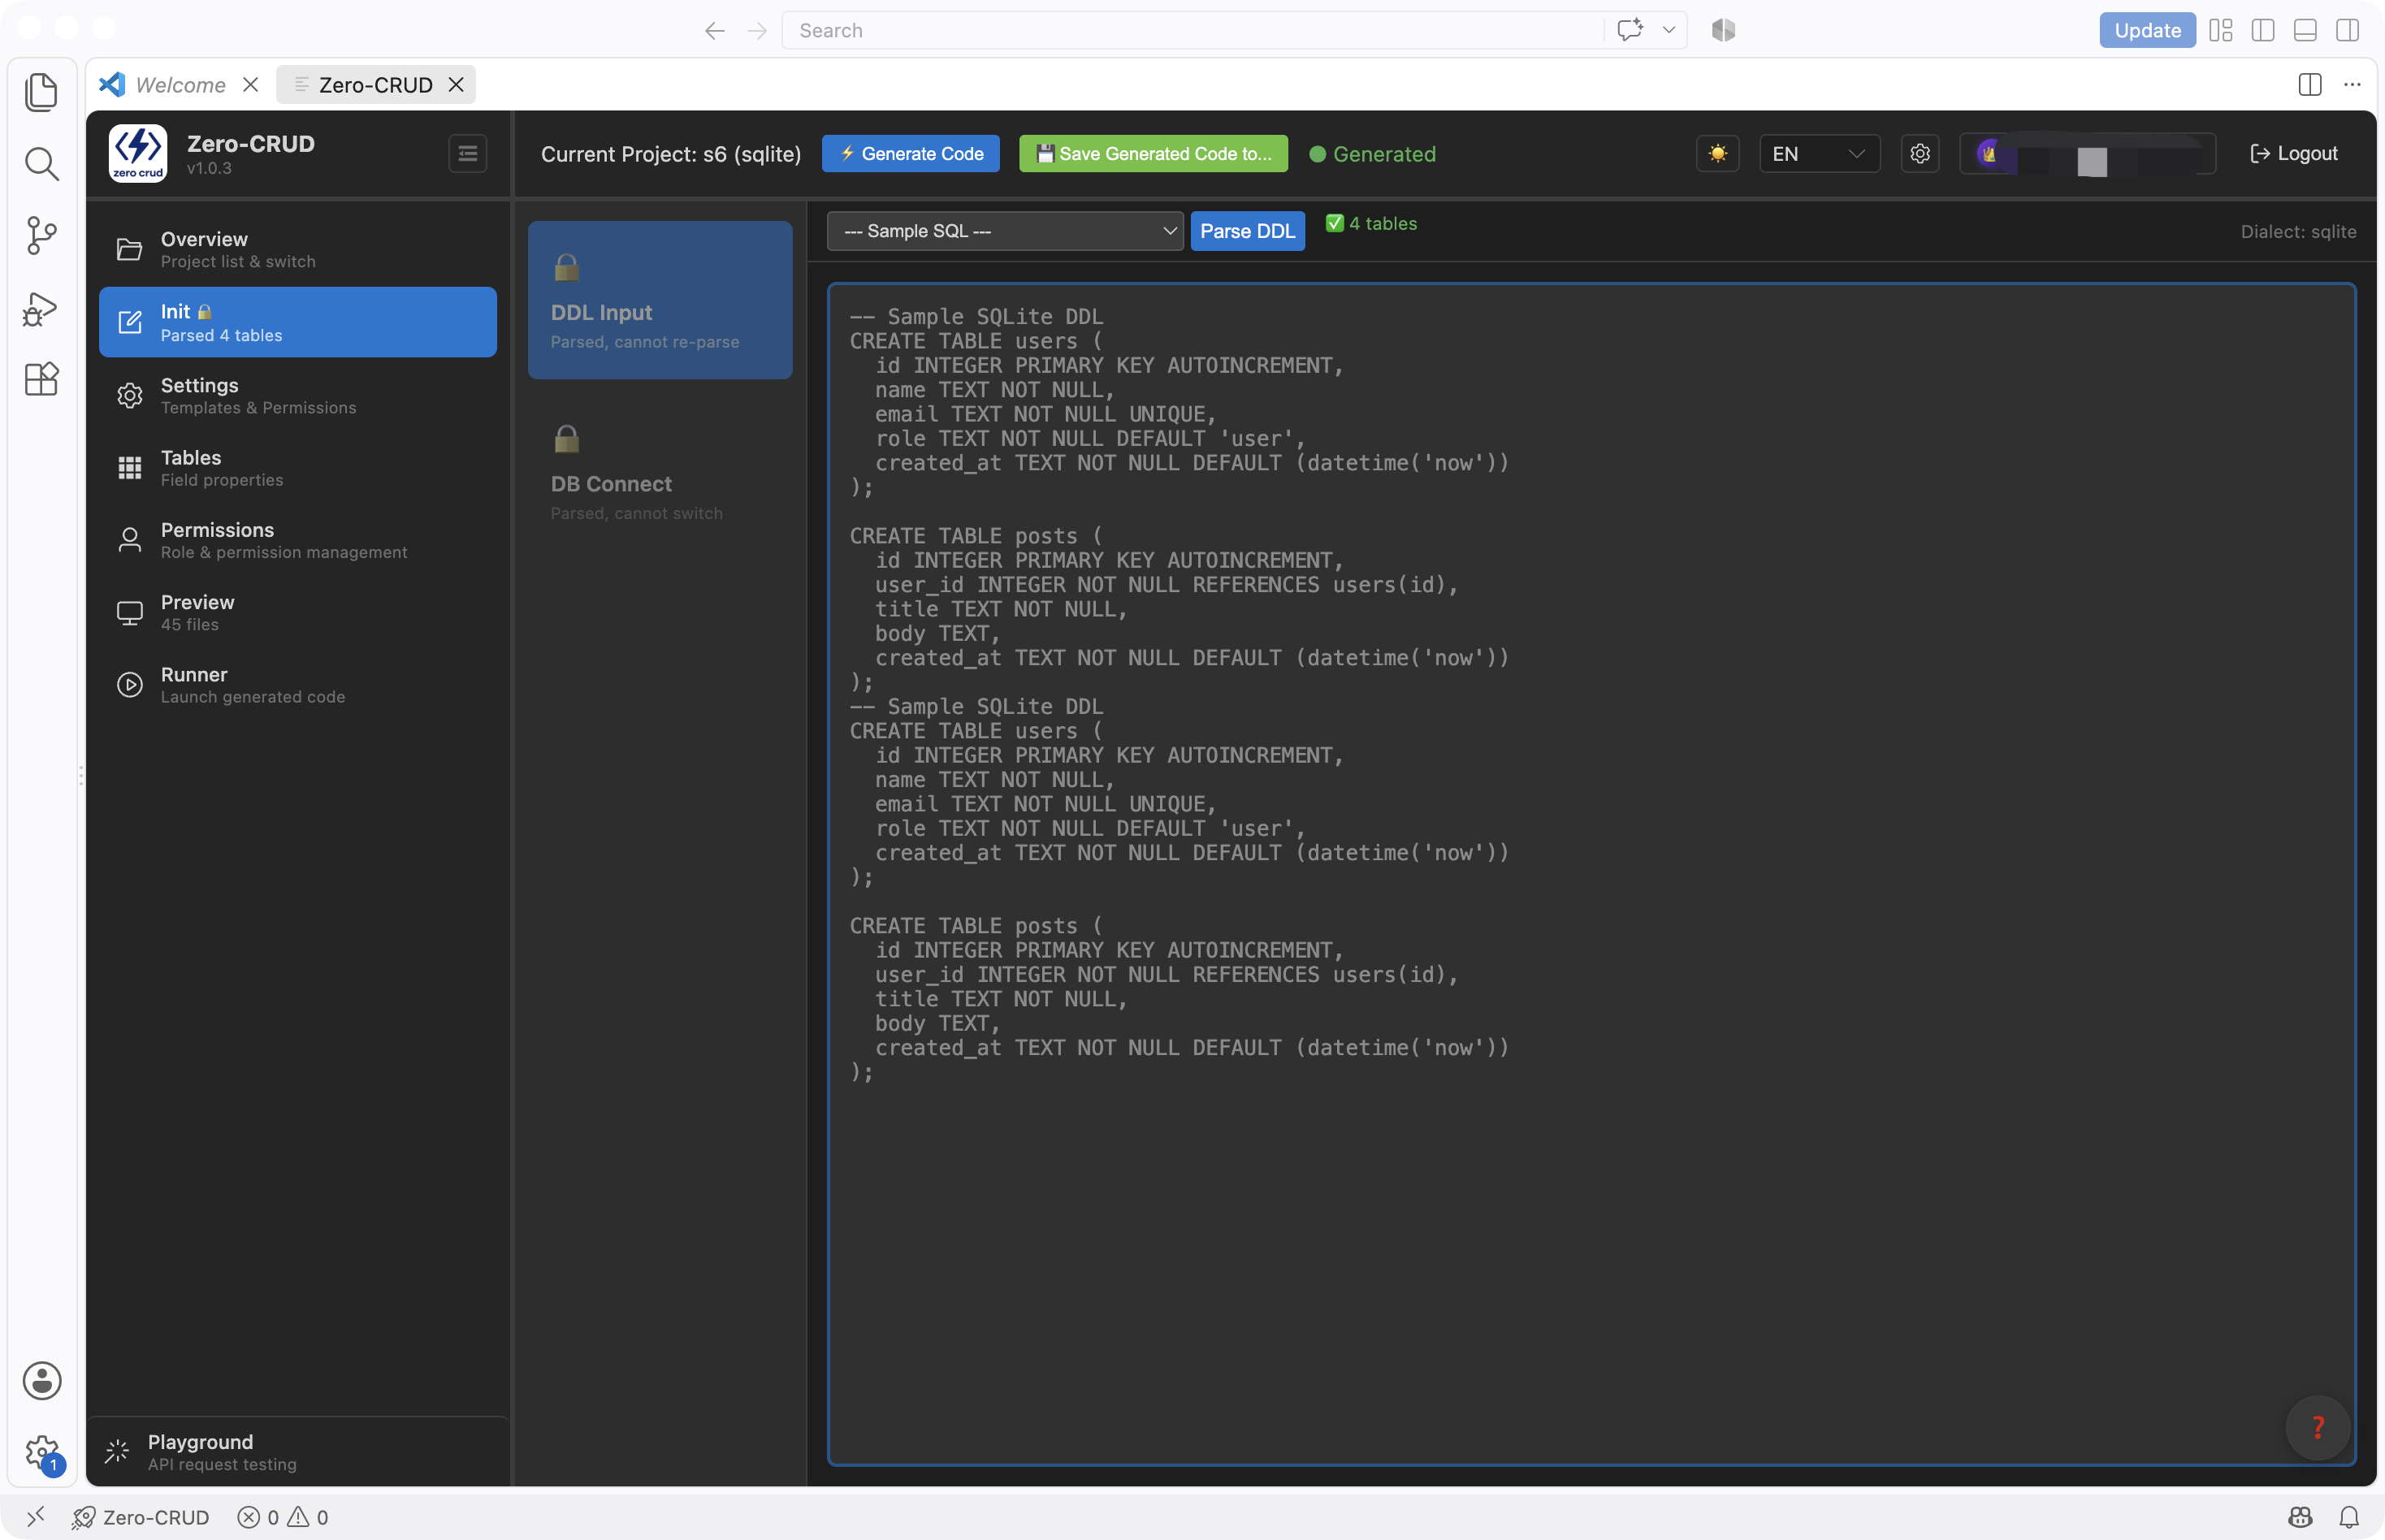
Step 1: Describe your table schema
Either way works:
- SQL mode: paste DDL, e.g.:
CREATE TABLE users (
  id         INTEGER PRIMARY KEY AUTOINCREMENT,
  name       TEXT    NOT NULL,
  email      TEXT    UNIQUE,
  created_at TEXT    DEFAULT CURRENT_TIMESTAMP
);- Connect a database: connect to an existing database and read its schema automatically
Click Parse; the imported table appears in the sidebar on success.
Step 2: Configure settings
Pre-generation parameters:
- Basic: project/table/field/foreign-key settings (available to all users, see Basic Settings)
- Advanced: role permissions, automatic timestamps, soft delete, audit, data permissions (subscribers, see Advanced Settings)
You can generate without changing anything — defaults work out of the box.
Step 3: Generate code
Click Generate in the top bar or in Settings:
- Backend & frontend languages are chosen in project settings (e.g.
ts-backend+vue-frontend) - When generation finishes → go to Preview and see the complete file tree
If you change config after generating, regenerate for it to take effect.
Step 4: Preview & download
- Preview: browse all generated files by directory
- Download: package everything into one ZIP
- Export: export to a folder of your choice, or copy files to the clipboard
Step 5: Run & test
- Runner: one-click start of the generated backend/frontend (handles dependencies and database automatically)
- Playground: send requests straight to the generated APIs — no frontend code needed
See Runner Usage and Playground Usage for specifics.
Run through it with the users table
- Paste the DDL above → Parse → the
userstable appears - Keep default settings → Generate
- Preview to confirm files were generated
- Runner starts the backend → see the port ready
- Playground, select the
Listendpoint → Send → get the paged query response
At this point, a complete backend + frontend for one table is in your hands.